Catering Lunch Boxes for Bulk Food Service: Plan the Meal, Packing Line, and Pickup
Successful catering lunch boxes are planned around the meal and the service journey, not selected as a last-minute container. Match capacity and compartment layout to the menu, separate hot and cold components where the service plan calls for it, and make packing, stacking, delivery, and pickup easier to control. This guide turns those decisions into a practical brief for bulk food service.
2026-08-21 - 8 min read
Summary
Successful catering lunch boxes are planned around the meal and the service journey, not selected as a last-minute container. Match capacity and compartment layout to the menu, separate hot and cold components where the service plan calls for it, and make packing, stacking, delivery, and pickup easier to control. This guide turns those decisions into a practical brief for bulk food service.
Why Lunch-Box Planning Matters at Catering Scale
A single boxed lunch can be corrected at the counter. A run of several hundred meals cannot. At volume, small mismatches in portion space, packing order, or handoff instructions repeat across the whole service.
The box is part of the operating plan. It affects how the team portions food, where labels go, how completed meals wait for dispatch, and how guests identify the right meal at pickup.
Start with the menu and the route from kitchen to guest. That makes it easier to choose a format deliberately rather than asking one box to solve every menu.
Start With the Menu and the Portion Map
Before discussing a container shape, write down what each lunch includes. A clear meal map should identify the main item, sides, sauces, dessert or fruit, beverage if included, and any dietary variations.
Set Capacity From the Finished Portion
Capacity should reflect the prepared portion, garnish, and any space needed to close the package without compressing the food. A container that looks adequate when empty may be awkward once rice, protein, vegetables, and a sauce are packed together.
Use the actual production portion during internal evaluation. Note whether the meal is shallow or tall, loose or compact, and whether it will be eaten immediately or held for a scheduled pickup.
Use Compartments When Separation Serves the Meal
A divided lunch box can help keep a main dish, starch, and side in their intended places. It is particularly useful when components should remain visually distinct or when a sauce would change another item’s texture.
A single-cavity format may be simpler for sandwiches, wraps, or composed meals intended to be enjoyed together. The better choice is the one that supports the menu without creating unnecessary extra packs.
Decide How Sauces and Add-ons Travel
Dressings, gravies, crunchy toppings, cutlery, napkins, and dietary notes need a defined place in the packing sequence. If a component should be added at the point of eating, plan that handoff instead of relying on an improvised placement inside the meal box.
Match the Lunch Box to the Service Style
The same menu can need a different format depending on how it reaches the guest. A staffed corporate pickup, a delivery drop, and a self-serve event table place different demands on the packaging and labeling process.
Counter Pickup and Named Distribution
For pickup service, make the top of each completed meal easy for the team to identify. A consistent label position can carry the guest name, meal choice, dietary instruction, or pickup group.
Arrange finished boxes by the distribution order rather than by the order they left the packing line. This reduces searching at the handoff point and helps the host see what remains.
Delivered Individual Meals
For delivery, the packing plan should account for the time between closing the lunch box and the recipient opening it. Keep the label readable after the boxes have been staged, moved, and placed at the destination.
Build each delivery unit from a repeatable sequence: meal, accompanying items, label, count check, then transfer to the designated delivery grouping. The exact order may change by menu, but the team should use the same order across the run.
Self-Serve Catering Stations
At a self-serve station, guests need to recognize choices quickly. Group meal variants clearly and keep matching labels visible without requiring guests to open multiple boxes.
If hot and cold meals are offered together, create separate staging zones and a clear replenishment plan. The objective is orderly selection, not simply filling the table with boxes.
Plan Hot and Cold Components as Separate Decisions
Temperature management starts before packaging. Identify which components are intended to be packed hot, which should stay chilled, and which items should be assembled later.
Keep Cold Items Out of a Hot Meal’s Path
Salads, fruit, cold sauces, and chilled desserts may need their own place in the workflow. Separating them operationally can protect the intended serving condition and prevent a cold component from being packed against a hot item by default.
The right approach depends on the menu, hold time, and service conditions. Confirm the chosen format and procedure for the actual use rather than assuming one setup works for every event.
Use Packaging Time as a Production Control Point
Set a practical time for each meal to move from final assembly to staging. This gives the kitchen, packing team, and service lead a shared point for managing the run.
For large orders, record the batch, meal type, and destination as boxes are completed. A simple count sheet can reveal a missing variant before the meals leave the kitchen.
Design the Packing Line for Repetition
Bulk catering succeeds when every station has a clear job. Put components in the order they are added, with labels and ancillary items where the packer can reach them without crossing the line.
Create a Standard Pack-Out Sequence
A usable sequence might include portioning the main meal, adding separated sides, placing designated accessories, closing the box, applying the label, and completing a count check. Document the sequence in short language at the station.
The goal is not to add paperwork. It is to make the finished lunch consistent even when several people pack at once.
Build in a Final Visual Check
Before a batch moves to staging, check the meal against the menu map: correct variant, intended components, closed package, readable identification, and the correct pickup or delivery group.
This review is especially valuable when one event includes vegetarian, allergen-aware, or client-specific meal choices. It helps catch a mismatch while the line can still correct it.
Stage and Stack Meals for the Actual Journey
Completed boxes often wait before they are collected, loaded, or set out. Plan that waiting period as carefully as the assembly step.
Confirm the Staging Footprint
Choose a staging area that can be organized by event, route, or pickup group. Leave room for staff to count and move each group without mixing it with another order.
Consider the box footprint and the way completed meals will be arranged. A consistent orientation makes labels easier to scan and helps the team see the number of meals in a group.
Treat Stacking as a Workflow Check
If meals will be stacked for staging or delivery, evaluate that arrangement with the intended filled menu and the planned handling route. Observe whether the stack remains orderly and whether labels remain visible to the people who need them.
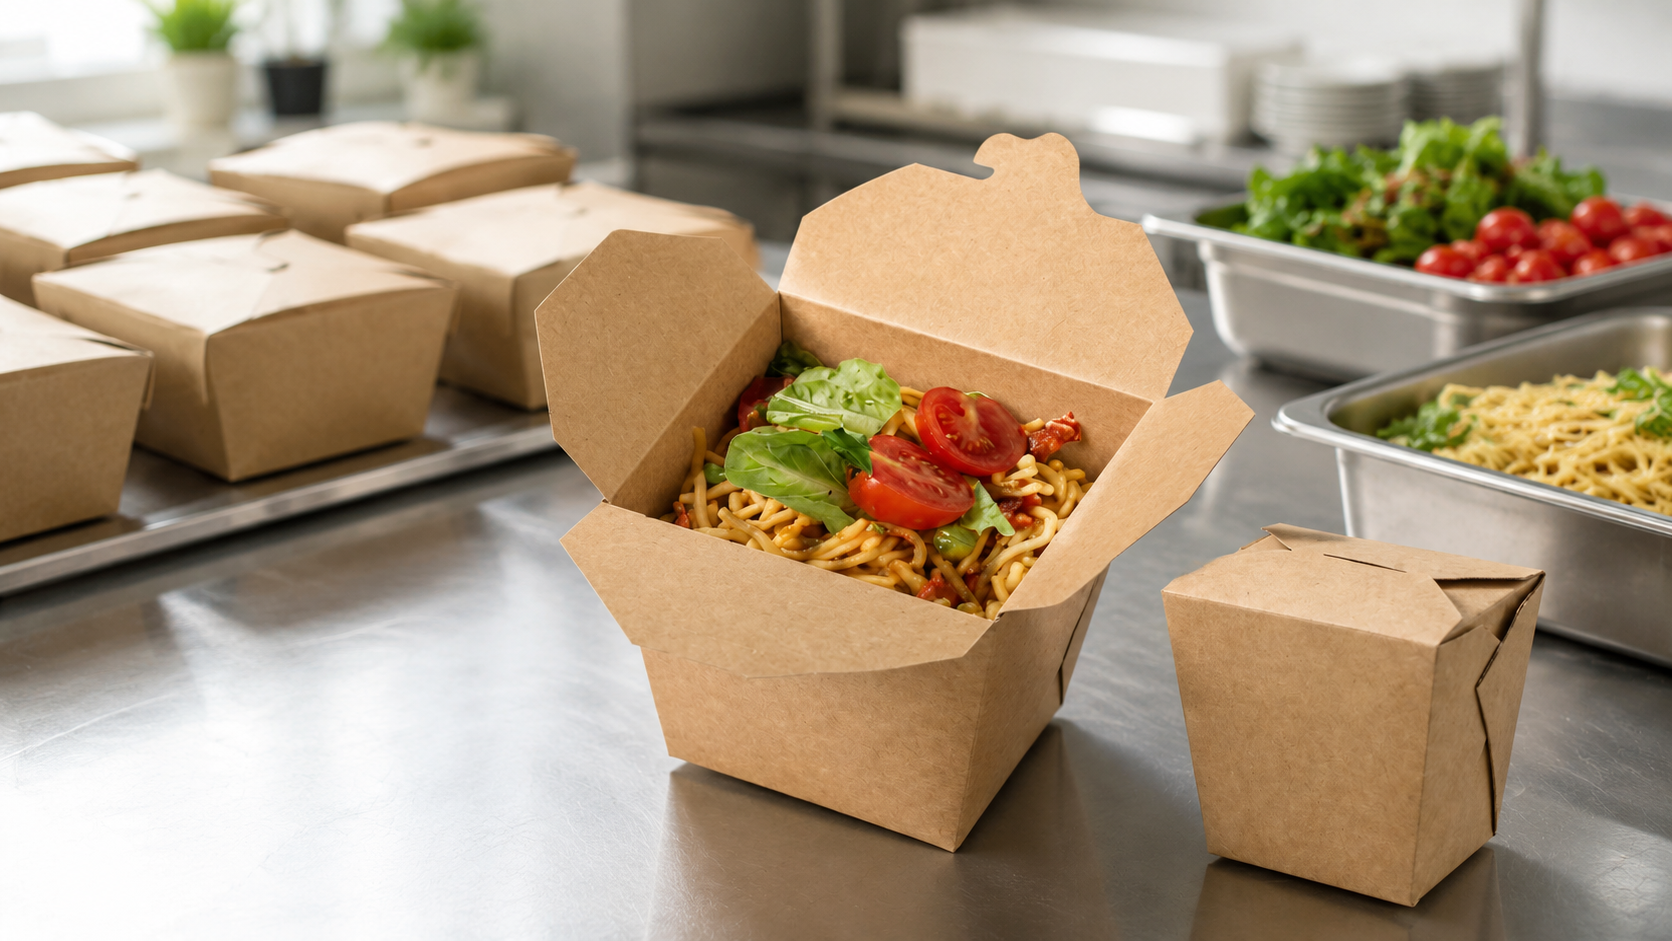
Do not turn a visual product reference into a performance claim. A food-box image can help communicate a lunch-box concept, but the intended menu, service method, and handling conditions should be checked by the operator before use.
Create a Purchasing Brief That the Team Can Reuse
A strong brief helps purchasing, operations, and the supplier discuss the same requirement. It should describe the service need, not just a generic request for lunch boxes.
Include the Information That Changes the Format
Record the menu type, expected portion, number of meal components, hot and cold arrangement, service style, label requirement, staging method, and anticipated packing quantity. Add any artwork or brand requirement separately so it does not obscure the operational brief.
Also record what must be confirmed for the intended use. That may include material information, applicable documentation, or format suitability; request and review it directly instead of inferring it from a photograph or a general product description.
Standardize Where the Menu Allows It
Using a manageable set of formats can simplify storage, training, and replenishment. Standardization should follow the menu, though. Keep an alternative format when a specific meal needs a different capacity, separation pattern, or service method.
Questions to Ask Before a Bulk Catering Run
Should every meal use the same lunch box?
Not necessarily. Use one format where it supports several meals, but do not force a single format onto items that need different separation, capacity, or handling.
Are compartments always the better choice?
No. They are useful when distinct components need to remain separate. A single-cavity box can be more suitable for a sandwich, wrap, or an intentionally combined dish.
What should be tested in the real workflow?
Review the complete sequence with the actual menu: portioning, closure, labeling, staging, movement, delivery or pickup, and the condition at handoff. Document observations and adjust the brief before a larger commitment.
Make Catering Lunch Boxes Support the Service Plan
The most useful catering lunch box is the one that fits the meal, the packing line, and the guest handoff as one system. Define portions and components first, plan hot and cold items intentionally, then organize the line, staging area, and pickup process around the selected format.
For a conversation about foodservice packaging options based on a defined meal and service brief, visit TakeawayPack. Confirm the relevant product details and suitability for your intended application directly before ordering.