How to Test Food Packaging for 30–45 Minute Delivery Without Losing Heat or Crispness
For a 30–45 minute delivery window, packaging should be evaluated as a menu–container–outer-packaging–bag system rather than as a container purchase alone. Hot food releases moisture; when that moisture is trapped or transfers between components, condensation and softening can follow. The practical response is to define the menu conditions, select candidate configurations, run repeatable route simulations, and record temperature, condensation, texture, leakage, and package condition at handoff.
2026-08-16 - 8 min read
Summary
For a 30–45 minute delivery window, packaging should be evaluated as a menu–container–outer-packaging–bag system rather than as a container purchase alone. Hot food releases moisture; when that moisture is trapped or transfers between components, condensation and softening can follow. The practical response is to define the menu conditions, select candidate configurations, run repeatable route simulations, and record temperature, condensation, texture, leakage, and package condition at handoff.
This article gives a test method for comparing controlled venting, lid geometry, compartment separation, insulation layers, and bag-loading practices. It does not assume that any material, format, or price point will meet a particular menu or route requirement. Confirm the final configuration with samples and tests that reflect the actual food, fill weight, route, stacking pattern, and operating conditions.
Why hot delivery food needs a system test
A delivery container does two jobs that can pull in different directions. It needs to limit heat loss, while also managing the water vapour released by hot food. A closure that limits airflow may retain more of the hot, humid headspace. A more open configuration may allow vapour to leave, but can change heat loss and spill exposure. Neither outcome can be judged reliably from a product description alone.
The same principle applies to the complete order. A container that looks acceptable on a counter may behave differently after it is stacked with other orders, enclosed in an outer bag, placed in an insulated courier bag, and carried over a real route. The relevant question is therefore not “Which packaging keeps food hot?” It is “Which tested configuration preserves the required condition for this menu and delivery journey?”
Start with a delivery test brief
Build a short brief before choosing samples. It makes comparisons fair and gives the team a record of what was actually validated.
Define the menu groups
Separate items by the way they create or respond to moisture. Useful groups may include:
- crispy fried or baked items;
- dry rice, grains, or roasted items;
- sauced, high-moisture, or liquid items;
- oily items;
- mixed meals containing both wet and dry components; and
- chilled or cold items travelling in the same order.
Record serving temperature, fill weight, sauce volume, hold time before packing, and whether each item must remain separated from another item. A container that is being assessed for a dry snack should not automatically be approved for a hot sauce-based dish.
Define the delivery journey
Specify the intended time range, ambient conditions to be represented, number of containers per order, stacking sequence, outer packaging, and courier-bag arrangement. Include the normal delay between filling a container and placing the order into the courier bag.
For a 30–45 minute target, test both ends of the range. If operations experience occasional longer routes, log those separately rather than treating them as proof of the normal route result.
Agree on pass/fail observations first
Before the trial, decide what the team will inspect at dispatch, mid-route where practical, and arrival. The checklist can include:
- food temperature at defined locations;
- visible condensation on the lid, walls, and food surface;
- texture or crispness assessment using an agreed internal scale;
- leakage, lid movement, or spill evidence;
- grease or moisture migration to the exterior;
- container warping, softening, or loss of closure; and
- whether dry and wet components remained separated.
This is an evaluation plan, not a claim that every configuration can meet all criteria.
Test the menu–container interaction
The first trial should isolate the food and the primary container. Use the actual recipe and normal fill level, not water or an empty pack as a substitute for the menu item.
Compare closure and vent options carefully
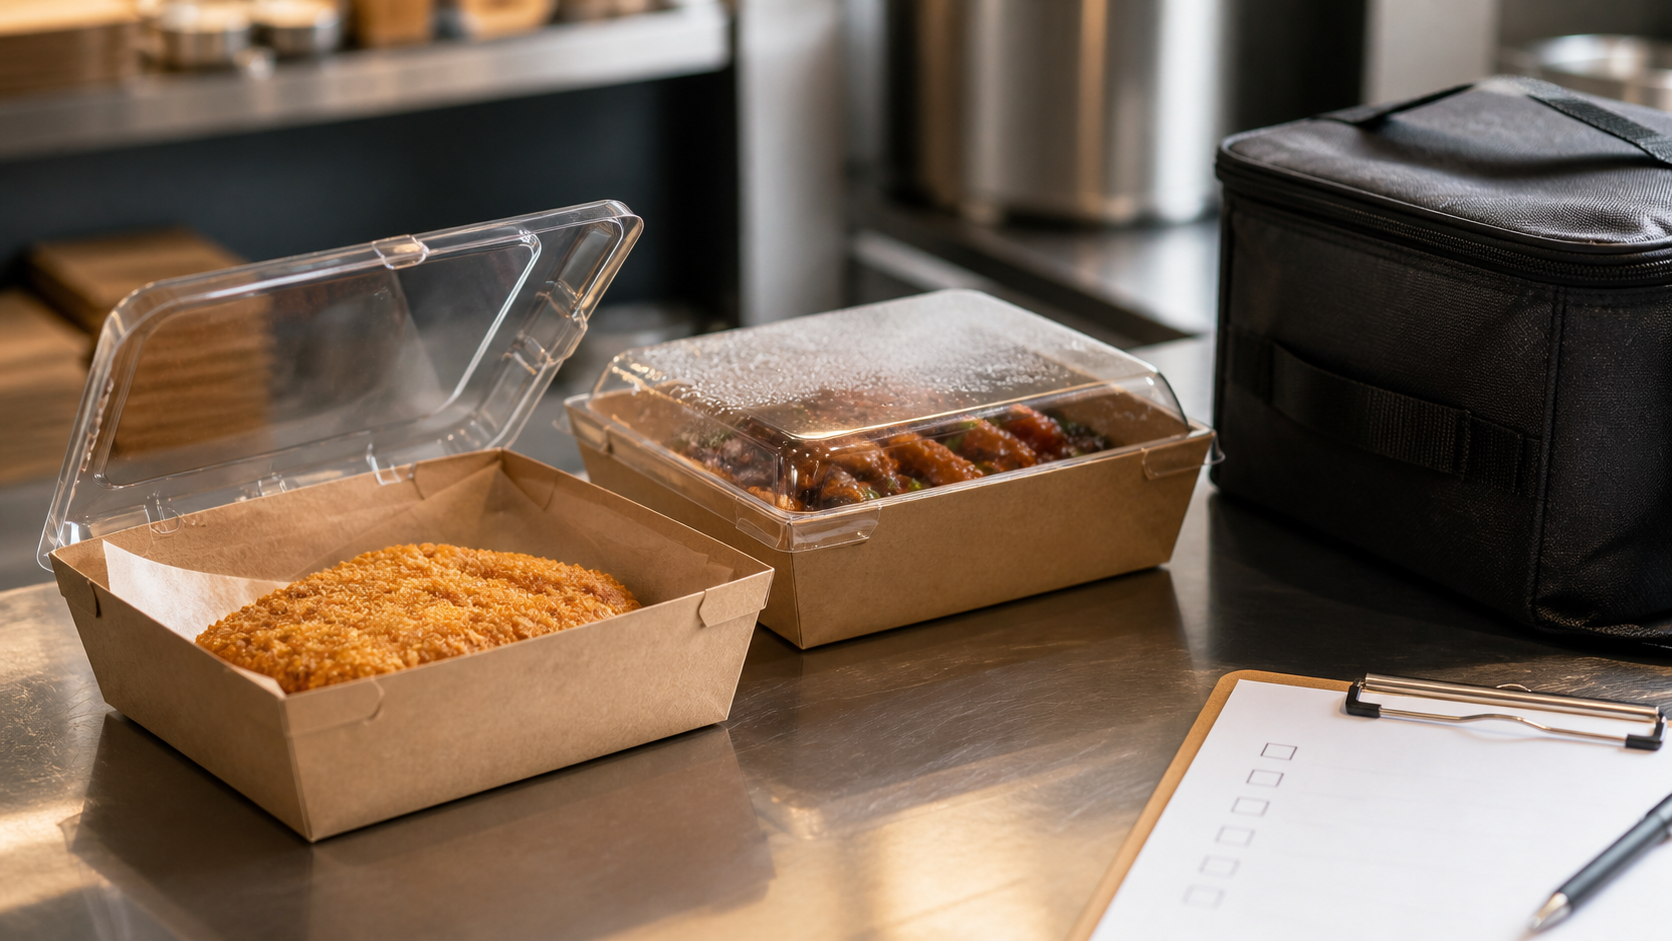
For crispy foods, teams may test a candidate closure with a controlled vapour path alongside a more closed version. Record where moisture collects, whether it returns to the food, and how the item feels at the planned arrival time.
For soups, gravies, or other spill-sensitive foods, a vented version may not be appropriate for the trial objective. Use the relevant closure condition and document spill checks separately. The result should identify trade-offs, not label any closure as universally better.
Inspect lid shape and headspace
When a lid has headspace above the food, moisture can collect on interior surfaces. During testing, photograph the lid interior at opening and note whether condensate pools, runs to an edge, or contacts the food. Compare candidate lid shapes only under equivalent fill, temperature, and travel conditions.
Do not treat a visible design feature as proof of condensation control. The observation must come from the route or simulation test.
Test separation of wet and dry components
For combination meals, test whether wet components migrate into dry components during packing, stacking, and transport. A divided format, a separate container, or a changed packing sequence can each be candidates. Compare the entire order: an apparent reduction in cross-contact is not enough if another part of the order becomes difficult to close, stack, or carry.
Test outer packaging and bag loading
The container is only one part of moisture and heat management. Outer packaging and courier-bag practices may change airflow, compression, and contact between hot components.
Run a stacked-order test
Prepare a typical multi-item order and place it in the intended outer packaging. Load it in the same orientation and stacking pattern used in service. At the end of the route simulation, check the top, middle, and bottom containers rather than inspecting only one item.
Document whether lids were pressed by adjacent packs, whether a hot item was placed beside a cold item, and whether the courier bag held the order in a stable orientation. These observations help distinguish a container issue from a packing-process issue.
Check the outer layer for trapped moisture
A closed outer bag can change the humidity around containers. At arrival, inspect the bag interior, the outside of each container, and any liner or separator used in the order. If moisture is present, record its location and likely pathway rather than assuming it came from one component.
Candidate changes may include revised loading order, separating hot and cold items, different use of internal dividers, or a different outer-packaging configuration. Each candidate needs the same route test before it is adopted.
Include handling events
Where possible, include representative handling: pickup, placement into the courier bag, a controlled tilt or vibration step, unloading, and consumer-style opening. These steps reveal whether a configuration remains closed and whether moisture shifts under movement. Use a documented, repeatable procedure so that one test can be compared with the next.
Use a repeatable 30–45 minute protocol
A simple protocol can help an operations team compare samples without overstating the result.
- Prepare the selected menu items using the normal recipe and service process.
- Record fill time, food temperature, fill weight, and the container/closure configuration.
- Pack the order with the planned outer packaging and courier-bag arrangement.
- Run the chosen route simulation for 30 minutes and repeat for 45 minutes under recorded conditions.
- At each endpoint, photograph the order before opening and inspect the agreed checklist.
- Record observations by menu item and component, including any leakage, moisture transfer, texture change, or deformation.
- Repeat trials as needed to understand variation before selecting a configuration.
Keep raw observations, photographs, and configuration identifiers with the result. If the menu, lid, liner, route duration, fill level, or bag-loading process changes, treat it as a changed configuration and reassess it.
How to compare options without making unsupported cost claims
The delivered cost of a packaging change is not just the unit price of the primary container. It can involve the number of components, packing time, storage, outer packaging, and operational changes. However, a lower unit price does not establish a lower delivered cost, and a higher unit price does not establish better delivery quality.
Build a comparison sheet for each tested configuration. List unit and component prices supplied for the relevant order quantity, the number of pieces used per order, any process changes, and the route-test observations. Keep cost comparison separate from quality observations until both are documented for the same configuration.
A procurement decision can then state what was tested and what was quoted, while avoiding conclusions that have not been validated for the specific menu and route.
Questions to ask before approving a packaging configuration
Use these questions in a purchasing or operations review:
- Which menu items and fill conditions were tested?
- What was the measured delivery duration for each trial?
- How were containers stacked, bagged, and handled?
- What did the team observe for temperature, condensation, texture, leakage, and structural condition?
- Which exact container, lid, liner, and outer-packaging components were used?
- What changes would trigger a retest?
- What pricing and order assumptions were used in the cost comparison?
This evidence-led approach makes it easier to improve one part of the system without turning a limited trial into a broad performance promise.
Talk through a sample-and-test plan
TakeawayPack can discuss packaging catalogue categories, custom requirements, and RFQ details with procurement teams. The appropriate configuration for a hot-food delivery program should be confirmed through samples and route testing for the specific menu and operating conditions. To start that conversation, visit TakeawayPack.